
Note: this is the first in what I hope will become a series of GCP Security 101 posts.
Most cloud governance or cloud security folks have never created a Google Organization from scratch. Typically you come into an organization that has already implemented some form of Google. Most likely, that implementation was organic. There was no planning, no design, it’s was just there. I’ve also found that cloud engineers typically only have access to https://console.cloud.google.com, but not the somewhat more interesting https://admin.google.com.
This post will take you through setting up a brand new and free Google Domain for use with GCP.
How Google Manages Identity
Unlike AWS, identity in google is centrally managed for an entire domain. The identities you use on GCP and other Google Services are managed via https://admin.google.com. Google Supports two types of identities: Google Workspace identities and free Google Cloud Identity identities. In this post, we’re only going to create the free cloud identities.
Step 1 - Decide on a domain.
I chose a subdomain off of one of my PrimeHarbor domains.
You will want to be able to receive email notices to your domain. However, because I use Google Workspaces for my email, I’m not able to add my subdomain as a User Alias Domain off of my main email domain. So I’ve created a little CFT that will take in-bound email to SES and send it to slack.
Step 2 - Sign up
I find it is easiest to do these next few steps in Incognito mode. That way none of my existing Google identities get in the way.
- Start at the Google Identity Welcome Page
- Click though the questions about your business and where it is located
- What’s your current email address? - The email address will become the super-admin recovery email
- What’s your business’s domain name? - This is the domain you’re about to create. It cannot already be used as a primary or alias domain in GSuite.
- What’s your name? - Enter your name, this will be used to create the first SuperAdmin account
- How you’ll sign in - This is the username and password for the first SuperAdmin account. You might want to create admin@yourdomain.com so that you’re not doing day-to-day activities as a SuperAdmin. Your SuperAdmin account can create new day-to-day user.
- Click “No thanks” about spamming your users with Google Marketing. Then prove you’re not a robot.
- Click on “AGREE AND CREATE ACCOUNT”
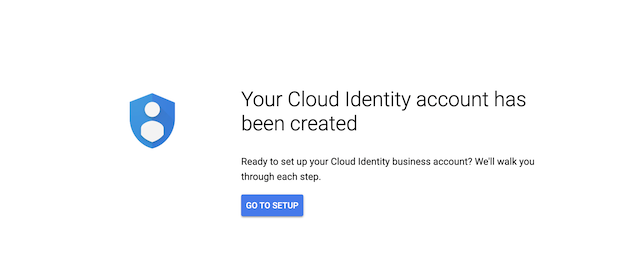
- Click “GO TO SETUP” and log in with the user and password from step 6 above
- Get a Text message verification to make sure you’re not a cave person. Don’t enter the “G-”
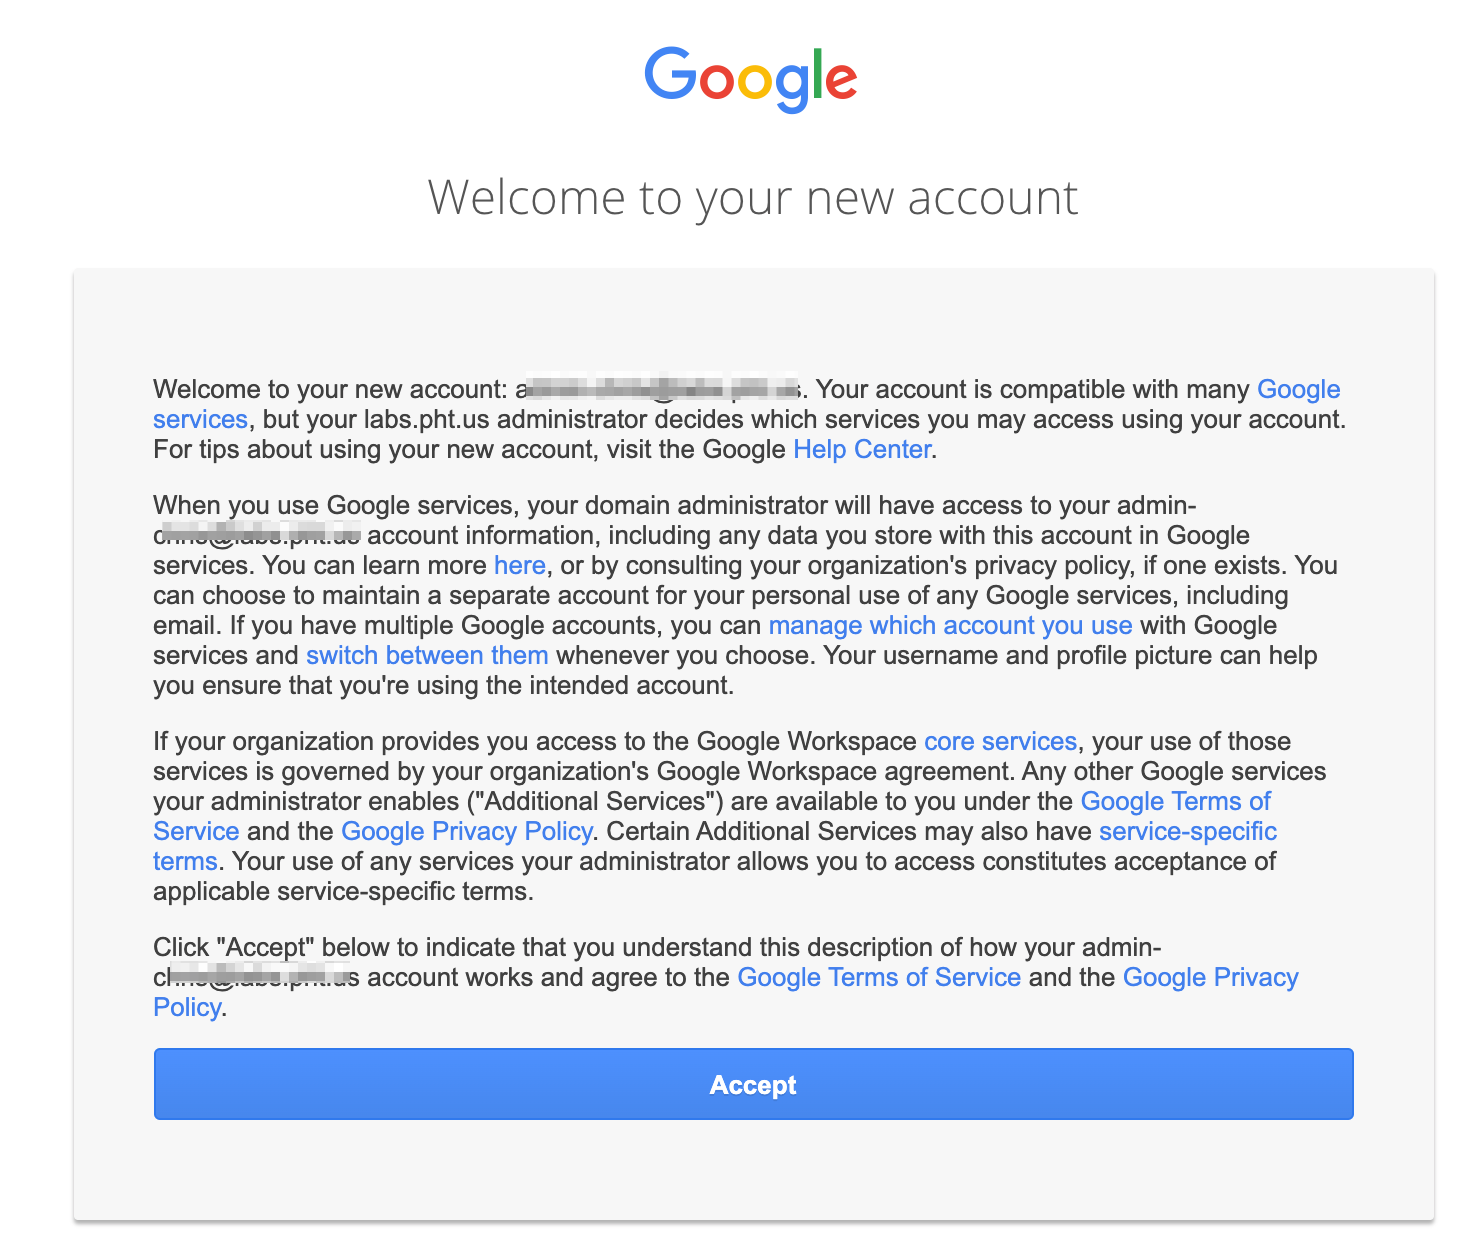
- Accept the Terms of Service
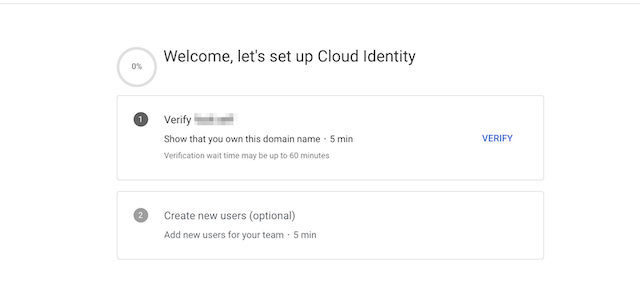
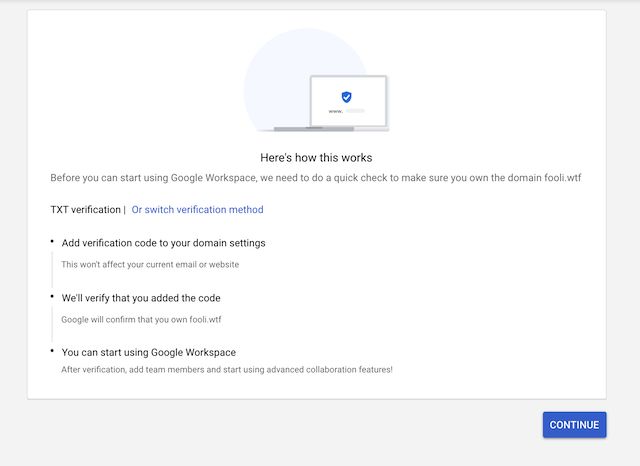
Step 3 - Verify you own the domain
It will now prompt you to verify you own this domain
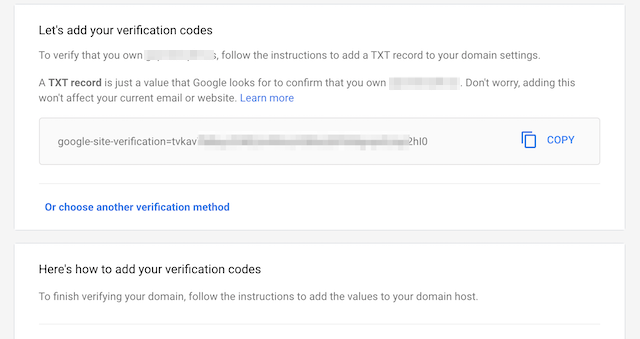
Once setup in Route53 (or where ever), you’ll see this for a little bit

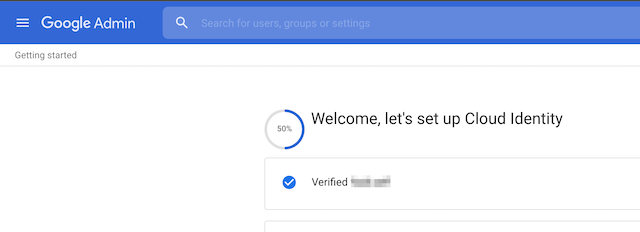
And once done you’ll be prompted to create a user. This will take you to the admin.google.com portal.
Step 4 - Configure things in admin.google.com
 There are a number of other security controls that should be setup at this point:
- Click “Show More” at the bottom of the sidebar to see the same options as you see at the right
- Under Directory > Users you can create a new user for day to day activities.
- Disable services you don’t need or want.
- Under Additional Google services
- Select all services
- Un-select Google Cloud Platform
- Click “OFF” in the upper right
- Agree to all prompts.
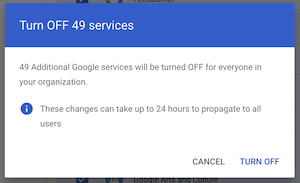
- Repeat for the services on page 2
- Disable Marketplace for users under Google Workspace Marketplace Settings
- Select “Block users from installing any app from Google Workspace Marketplace”
- Under Billing > Subscriptions you should only see “Cloud Identity Free” as the active subscription. As you’ve not given Google a Credit Card, you’re still entirely in a free tier.
There are quite a few settings under Security you want to review:
- Enable 2 Factor Authentication
- Allow Users to recover their own account if they have a recovery email or phone set
- Advanced Protection Program is a feature I’ve not (yet) experimented with.
- Configure password complexity and expiration
- Configure API access for Google Services
- Configure Re-authentication Settings for GCP
Finally, there are a large number of Alerting Rules Google provides for your domain. Note: they are all configured to send to the Super Admins. Unfortunately, it’s not easy to send to an email not part of your test domain. Therefore I recommend setting up some way of getting the emails from this domain. See my cheap trick to send these all to a slack channel
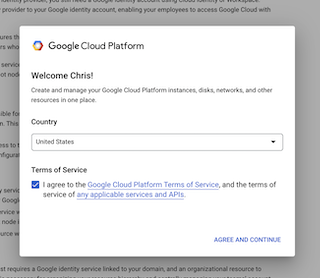
Step 5 - Start setting up GCP
- Launch GCP Setup
- Accept their Terms of Service.
- You’ll see a message at the bottom that your organization was created and your SuperAdmin user was granted “Organization Administrator” access.
- If you get a message like this one, you probably Disable Google Cloud Platform on the Additional Google services page.
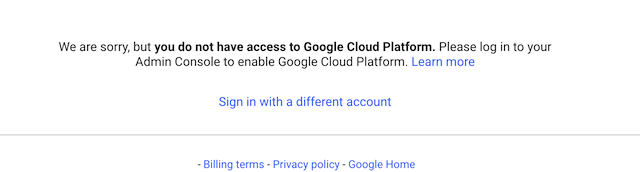
- If you get a message like this one, you probably Disable Google Cloud Platform on the Additional Google services page.
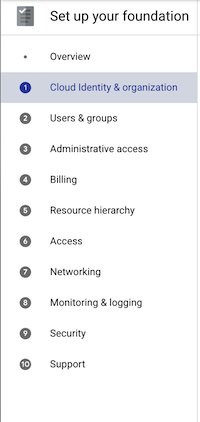 You’re now prompted with a 10 step list of tasks to configure GCP:
- Scroll down to the bottom of Cloud Identity & organization, verify the Task is complete, and move on to Users & Groups
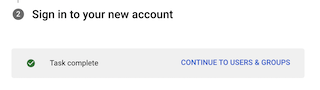
- Move on to Users & Groups. For most of these tasks you’ll see a “Task pending” or “Task complete” at the top of each step.
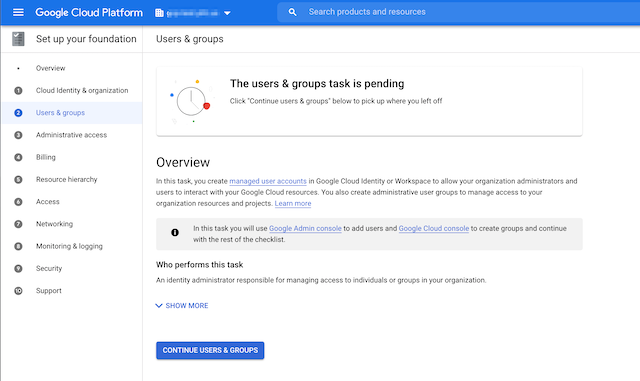
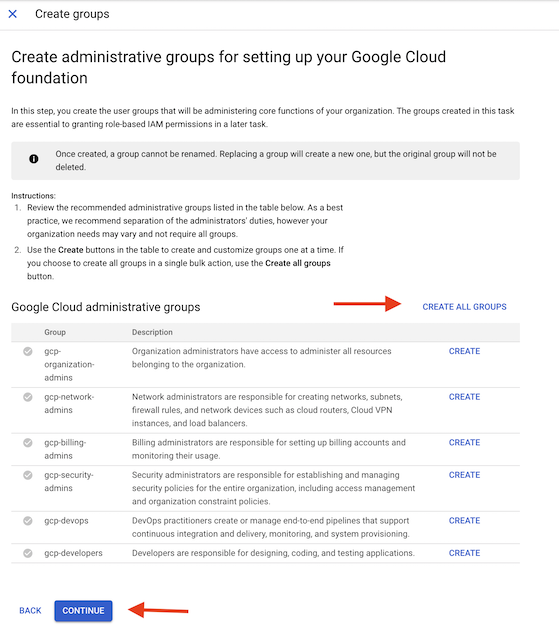
- “Create Groups” will create a number of groups in the admin console for your domain
- Create administrative users in the Google Admin console
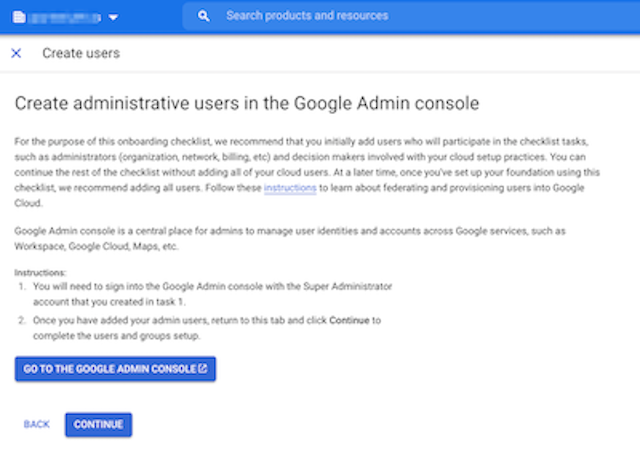
- Open the Admin Console
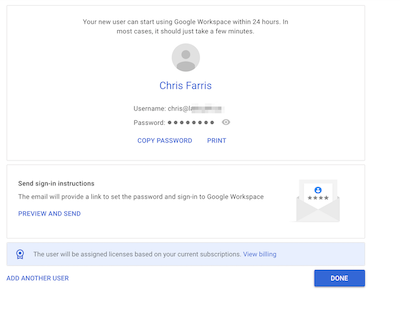
- If you’ve not already done so, create a non-SuperAdmin user who will be the main GCP administrator.
- Return to the GCP Page and click continue
- Add your administrative users to groups
- Add the regular user you created above to the “gcp-billing-admins” and “gcp-organization-admins” group.
- Confirm Users and click continue
- You’ll now see all the GCP Groups under in the Admin Portal under Directory > Groups
- Proceed the Step 3 - Administrative Access
- This step actually authorizes the groups created in step 3 with GCP Privileges.
- Copy the Group name
- Click the blue “GRANT ACCESS” button in the middle of the page
- Paste it in the “New Principals” box
- Click Save, then Continue.
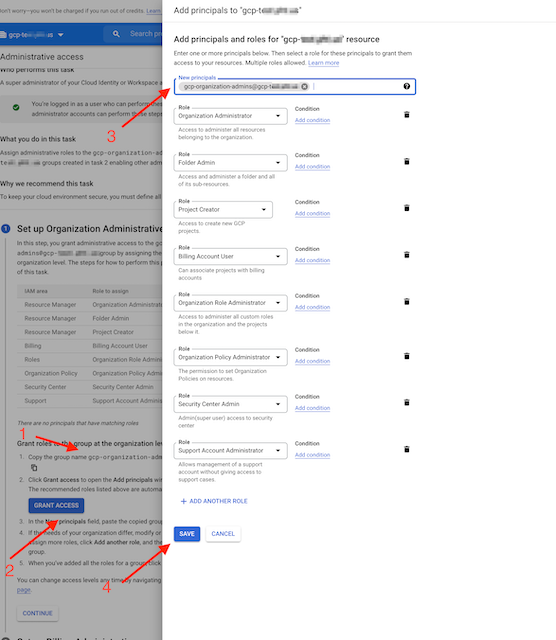
- Repeat for all the other Principals
- Mark the Task Complete and move on to Billing
Now, at this point you can stop working in order and do things differently. There is no need to setup a GCP Billing account if you’re not going to create billable resources. Note: there is probably also a “Start your free trial with $300 in credit…. ACTIVATE” at the top of your tab.
If you do skip the Billing step, you can Always return to it later. The remaining steps Google recommends are:
- Resource hierarchy will create the GCP Project Folder Structure. If you’re setting up a sandbox you don’t have to do this step. If you’re looking to create a non-prod version of your enterprise’s production GCP, you probably want to experiment with IaC here and have the folders match your company’s setup
- Access grants permissions to the other GCP Groups created in step 3. Specifically the Network and Security Admin groups.
- Networking Creates the VPCs and shares them across projects.
- Monitoring & logging enables Audit Logging (similar to AWS CloudTrail).
- Security enables Security Command Center and setups Organization Policies (which are similar to SCPs).
- Support is the last step, and probably one you won’t do for a free sandbox organization.
Networking, Monitoring & Logging, and Security will be their own blog posts in the future.
Delete your setup
You can delete your account via the admin portal.
- Go to Account settings > Account management
- Select “DELETE ACCOUNT”

- What happens next? I don’t know. I’ve never done it.